WELCOME TO MY MINI BLOG CLASS!! I am SO excited to teach you guys how to take self portraits on your DSLR.
Let’s get real, having a high quality camera and capturing other people is fantastic, but I find that SO many photographers are either capturing their life via iPhone OR forgetting to capture their own moments entirely. It’s time to change that and make sure that we are capturing our own lives in higher quality, intentional moments with our cameras. OR MAYBE you’re not a photographer, but have a DSLR that you want to be able to capture your moments with! Either way, this is for you!
Maybe you’ve heard about remotes or other methods, but this is my personal favorite. This method of taking your own self portraits with your DSLR doesn’t require any remotes (YAY HANDS-FREE), and I think it’s IDEAL for capturing candid, natural, raw moments of your life.
I remember when I learned how to take self portraits with my DSLR and it opened up a whole new world of possibilities when it came to capturing my own life! I still would like to be more consistent with it, but hey, I’m so thankful I at least know HOW to take self portraits with my camera for the moments I want to!
LET’S JUMP IN!
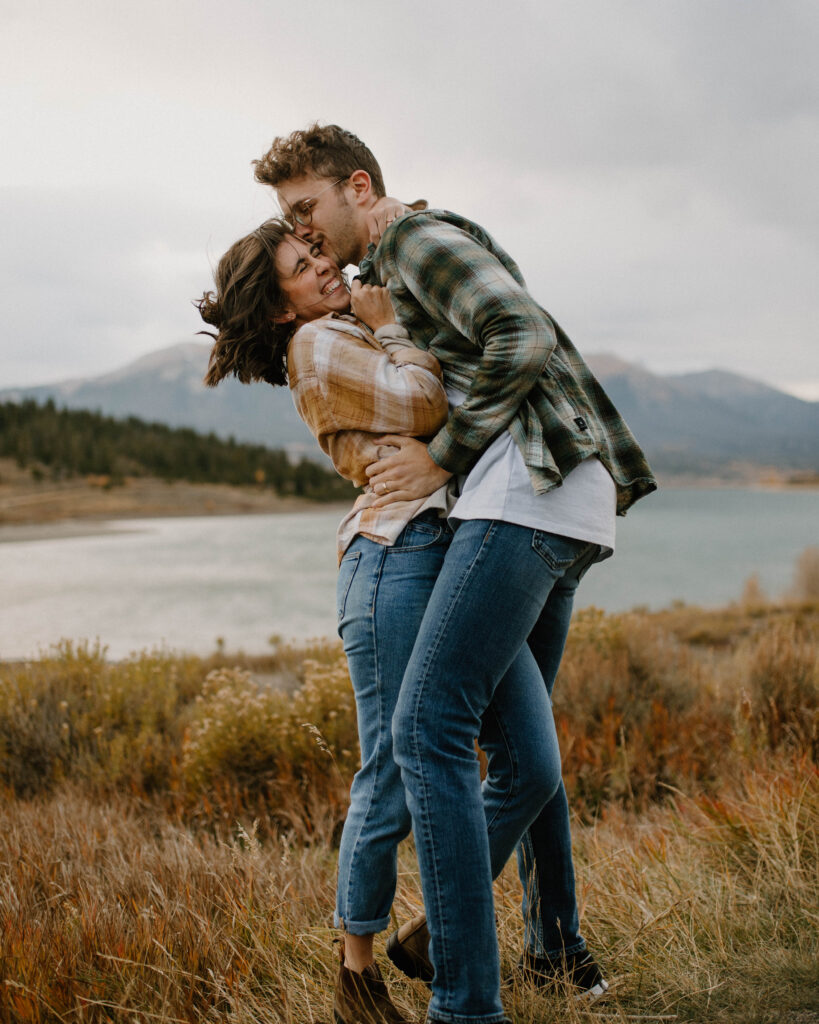
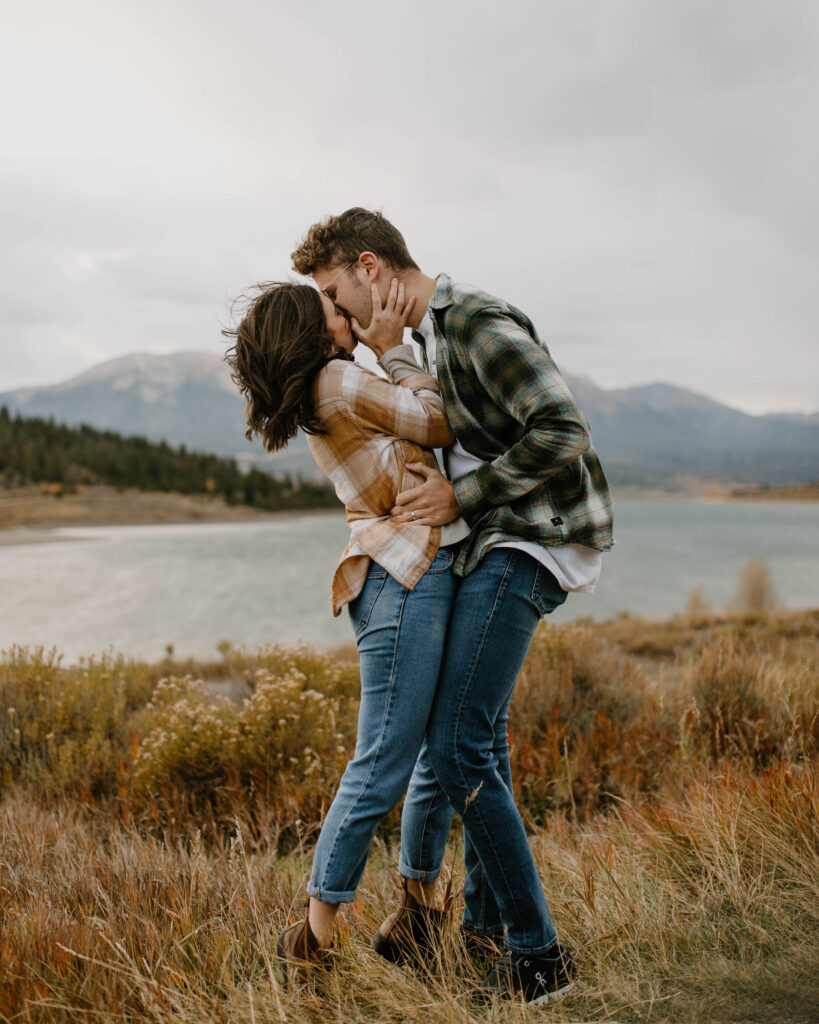
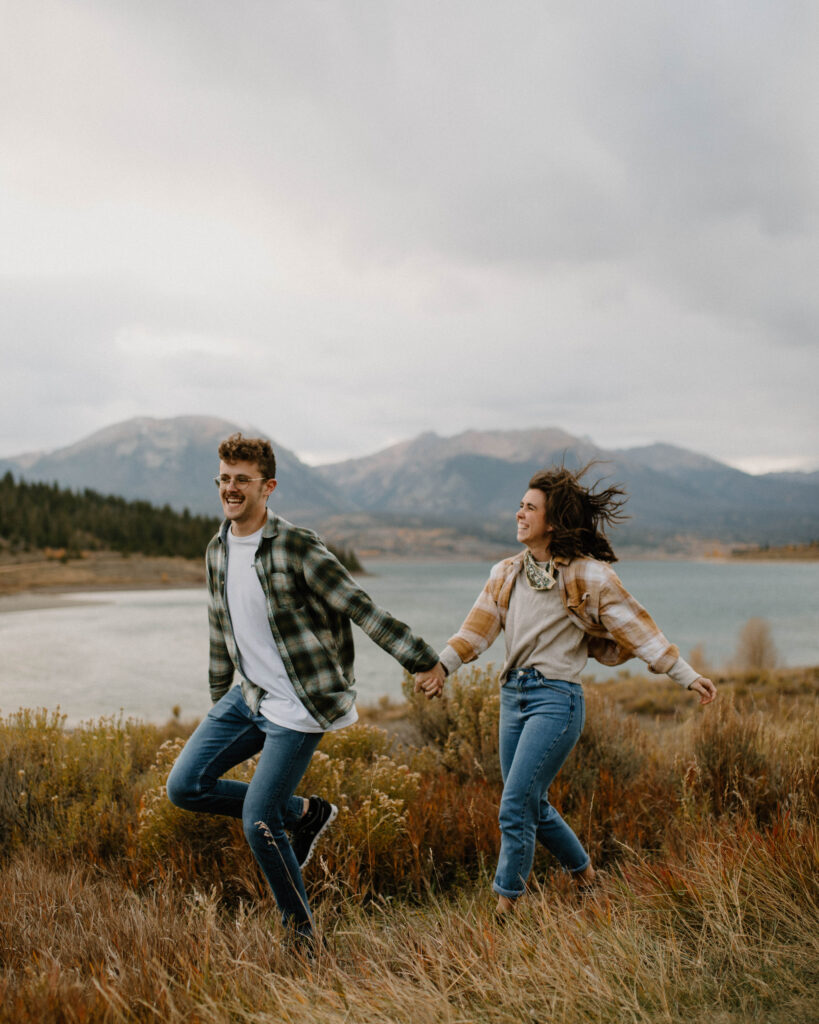
I’ll be using my husband and I as an example!
In October 2022 we went to Colorado for a friend’s proposal. While we were there of COURSE we had to get photos of us. The only problem… it was just the two of us. In comes the solution of taking our own self portraits on my camera!
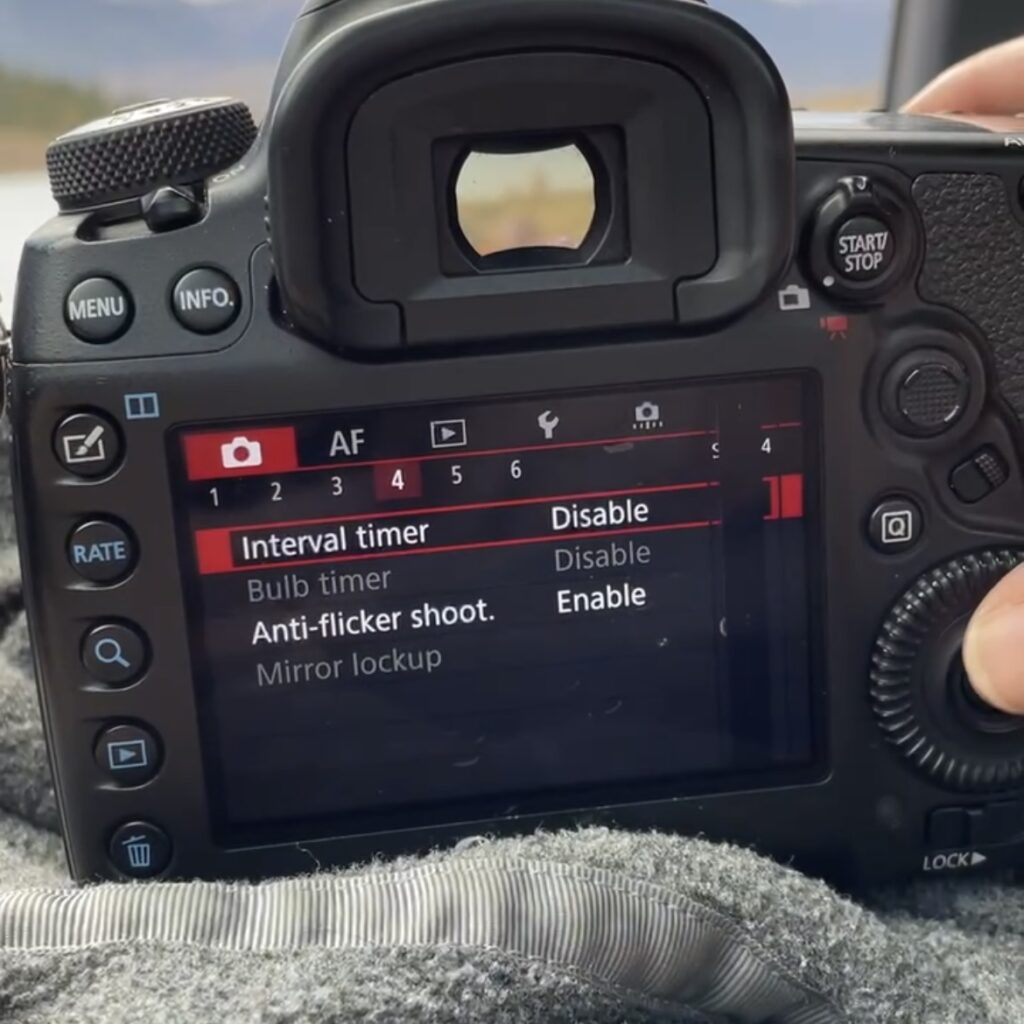
These were shot on a Canon 5D MK IV. I take my old one with me when I travel (hence the sad screen)
STEP ONE:
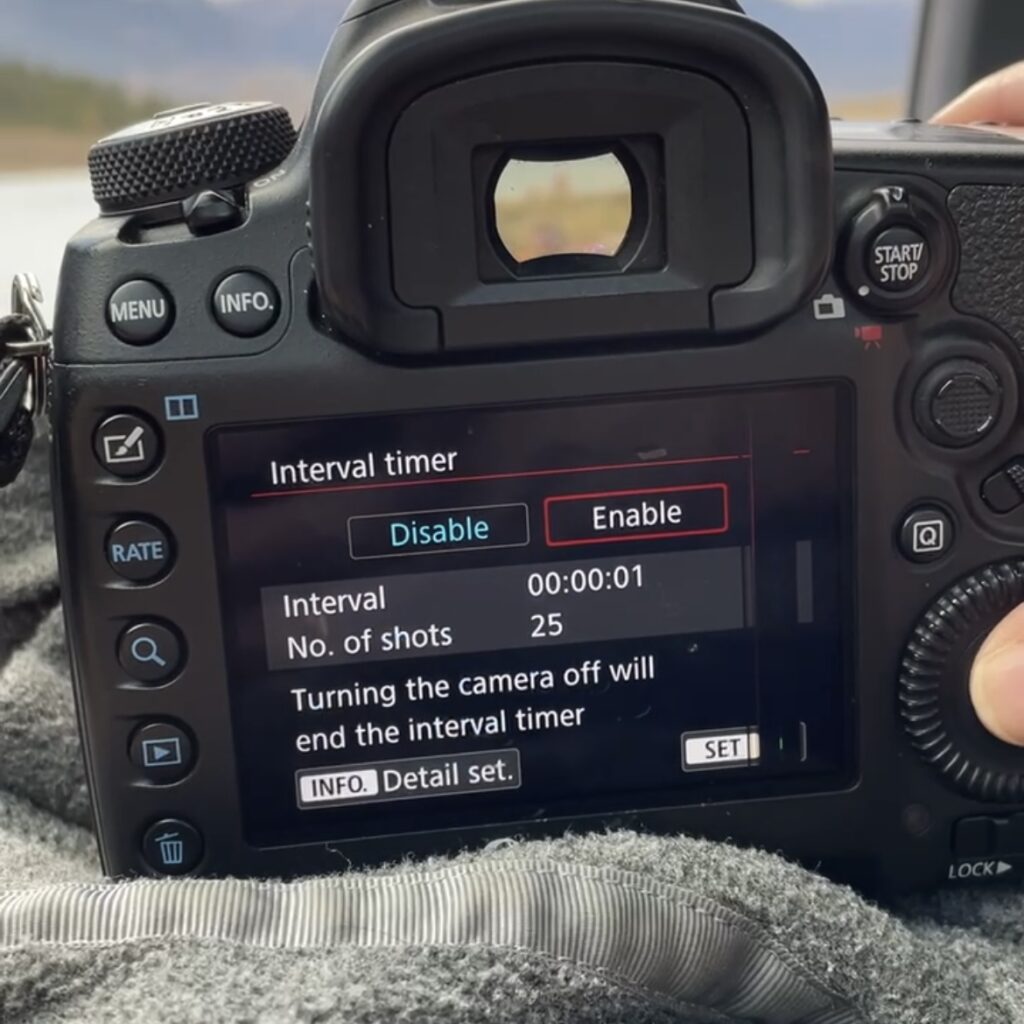
Go to your menu, and under the Camera tab page 4 you will see “Interval Timer”. Enable this feature.
It will ONLY be enabled for the duration you give it. This is not a setting that stays enabled.
If you’re not doing this on a Canon 5D MK IV your menu pages may be slightly different, but just look for “Interval Timer”
STEP TWO:
Once you tap in to Enable your Interval Timer, you will be able to see the amount of time between shots as well as the total number of photos you would like your camera to take once it begins.
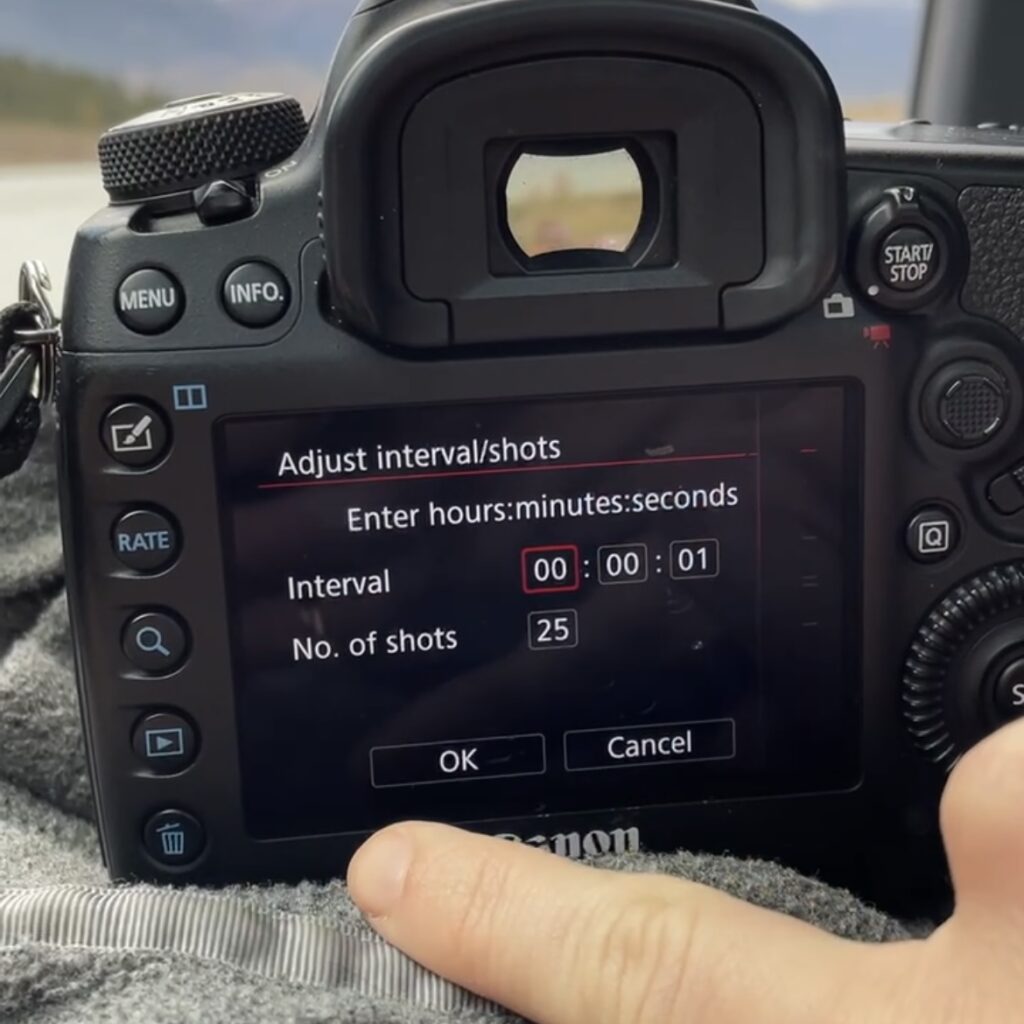
To adjust these settings, click into the lower left corner that says “Info. Detail Set.”
This is where you can set the amount of time between photos and the number of shots.
PERSONALLY, I love movement, so I set mine to shoot every second. I also like it to capture a handful of images, but not too many so that I can go back, glance, and see if I need to change or adjust anything. I find the sweet spot to be 25-40 images before it gets to be too much at once.
STEP THREE:
Go get in front of the camera!! If you’re having trouble or your camera is not focusing, just make sure it’s on tracking mode and you should be SET!
Here’s a little behind the scenes video of us in action applying this method.
Three poses for you and your babe to try
(because getting in front of the camera can be like “ok what now” LOL)
- Stand next to each other, hold hands, and sway out and back in!
- Throw your arms over his shoulders/neck. Kiss each other, whisper in the other’s ear, make the other person laugh!
- Put your back against his chest, let him wrap you up in his arms!
A PEEK AT THE RESULTS: